What Direction Should a Solar Security Panel Face?
Solar security panels face the wrong direction more often than you'd think, and that single mistake can leave your camera dead at exactly the wrong moment. Whether you live in Phoenix or Portland, getting the angle right decides how much energy your panel captures and how reliably your surveillance system runs.
Most solar security camera panels are 5W to 10W units that need 4 to 6 hours of direct sunlight daily. As of 2026, NREL data and manufacturer specs show that direction alone can swing energy delivery by 30% to 50%. Here's how to make the call.
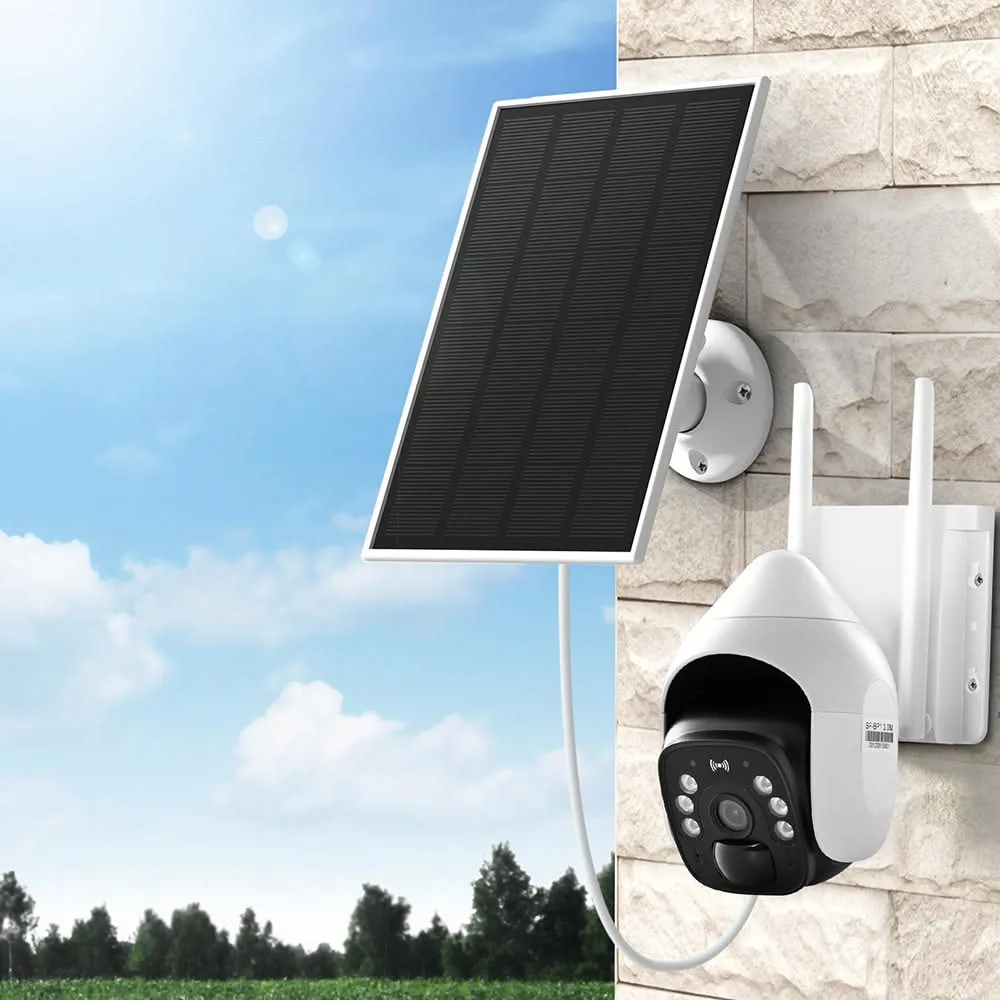
Image source: Bing (Web (fair-use with source credit))
Quick Answer
A solar security panel should face true south in the Northern Hemisphere. In the Southern Hemisphere, face it true north instead. The ideal tilt angle depends on your latitude.
For year-round use, set the tilt at your latitude. Adjust it seasonally for better winter and summer performance.
Problem: Why Getting Panel Direction Wrong Kills Your Security Camera Performance
Your solar security camera works fine for the first few weeks. Then it starts shutting down at night. Footage cuts out mid-event.
The battery never quite refills. Nine times out of ten, the culprit isn't the camera. It's the panel's direction.
Solar panels perform best when the sun hits them at a near-perpendicular angle. Point a panel the wrong way and you're throwing away a huge chunk of your available solar input. Energy harvest data shows that a panel facing due north in the Northern Hemisphere loses roughly 50% to 60% of potential output compared to one facing true south.
That loss compounds fast. A camera drawing 3W of power might only receive 1.5W of charge from a misaligned panel. Over a full day, the battery drains instead of refills.
The camera goes offline. You miss events. The entire purpose of a security system falls apart.
To put numbers on it, a standard 5W panel facing true south in Colorado can expect roughly 30 to 40Wh of daily energy harvest during peak summer. Flip that same panel to face true north and you'll see about 12 to 16Wh. Less than half.
The frustrating part is how easily this gets fixed. No rewiring. No new hardware.
Just reorient the panel and your camera stays powered through the night.
If your battery percentage has been declining for over a week despite sunny days, check the panel direction first. It's the most common cause and the fastest fix.
How Sun Path and Solar Azimuth Decide Your Optimal Panel Direction
Two terms drive everything here. Solar azimuth and tilt angle. Learn them and you'll never guess at panel placement again.
Solar azimuth is the compass direction your panel faces, measured from true north. In the Northern Hemisphere, the sun spends most of its arc in the southern sky. That's why panels point south.
The sun rises in the east, peaks in the south, and sets in the west. A south-facing panel catches the sun across the widest part of its daily arc.
Tilt angle is how steeply the panel leans away from vertical. The right tilt depends on your latitude. The rule of thumb is this.
Tilt the panel to your latitude plus 15 degrees for winter optimization. Or minus 15 degrees for summer. A fixed mount that sits at roughly your latitude year-round is a solid compromise.
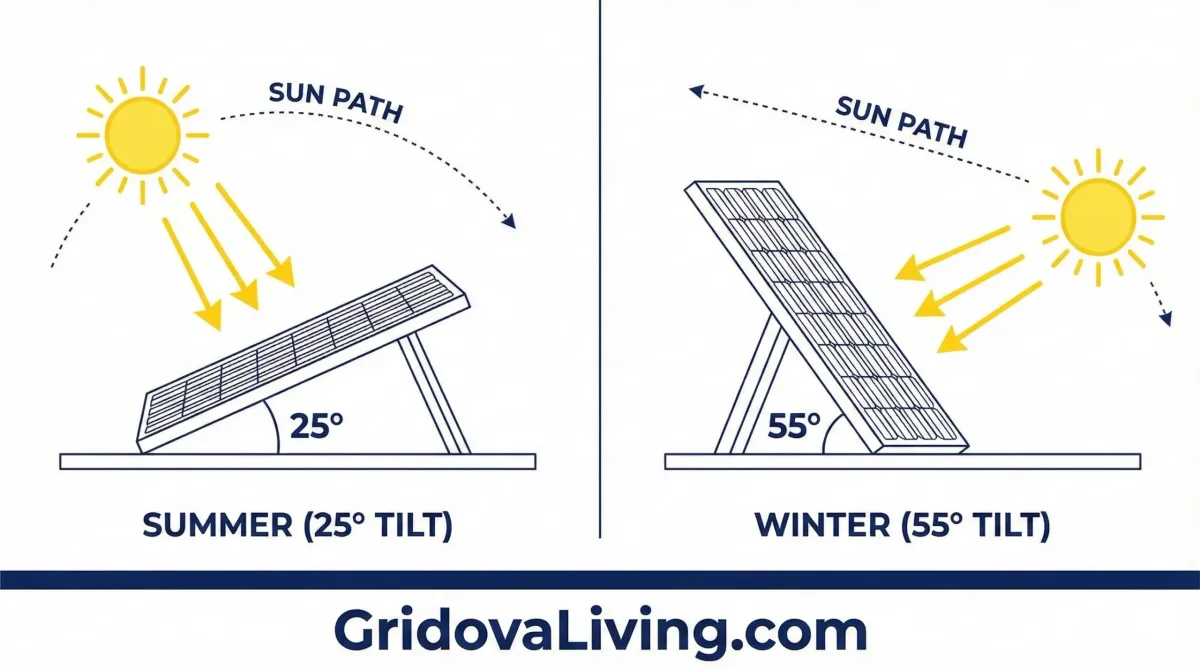
Image source: Web (Bing) / gridovaliving.com (Web image (fair-use with source credit))
The National Renewable Energy Laboratory maintains detailed solar resource data across the United States, and its solar resource data confirms that latitude is the single biggest factor in how much energy a panel can produce. A panel in Denver at 40 degrees latitude needs a different tilt than one in Miami at 25 degrees.
Here's a quick reference for common US locations:
| City | Latitude | Fixed Tilt Recommendation | Optimal Azimuth |
|---|---|---|---|
| Miami, FL | 25.8° | 25–30° | True South |
| Denver, CO | 39.7° | 35–45° | True South |
| Minneapolis, MN | 45.0° | 40–55° | True South |
| Seattle, WA | 47.6° | 45–55° | True South |
Remember, these are Northern Hemisphere figures. Southern Hemisphere locations flip the azimuth to true north but use the same latitude-based tilt logic.
Decision Tree: Choosing the Right Direction Based on Hemisphere, Latitude, and Shade
Not every situation calls for true south. Here's how to make the decision based on your specific conditions.
Image source: Bing (Web (fair-use with source credit))
Step 1: Determine Your Hemisphere
If you're in the Northern Hemisphere (US, Canada, Europe, most of Asia), face the panel true south. If you're in the Southern Hemisphere (Australia, southern South America, New Zealand), face it true north.
Step 2: Account for Magnetic Declination
A compass reads magnetic north, not true north. The difference between them is magnetic declination, and it can shift your optimal direction by 5 to 20 degrees depending on location. Use a true-north calculator or a declination-corrected compass app.
The U.S. Department of Energy provides declination correction tools that make this step straightforward.
Step 3: Assess Shade and Obstructions
- If the true-south direction has clear, unobstructed sky for most of the day, use true south.
- If trees, buildings, or fences block the south view for 3 or more hours of peak sun, look east or west instead.
- If only morning shade affects the south side, consider an east-facing panel. Cameras often need the most charge early in the day.
Step 4: Consider Your Camera's Usage Pattern
If the camera runs heaviest at night (motion detection, night vision), you want maximum charge during daylight. True south gives you the most energy overall. If the camera does most recording in the morning, an east-facing panel delivers charge right when you need it.
Step 5: Choose Your Tilt Angle
- Fixed mount: set it at your latitude. Simple and set-and-forget.
- Adjustable mount: set it at latitude plus 15 degrees for winter, latitude minus 15 degrees for summer.
- If snow is a concern, add 5 to 10 extra degrees of tilt so snow slides off the panel surface.
When East-Facing or West-Facing Panels Actually Make More Sense Than True South
True south is the default answer. It's not always the best one.
In dense urban areas, south-facing walls often sit in shadow for hours. Tall apartment buildings, commercial structures, and tree-lined streets can block the sun during peak production hours. Research on urban solar access shows that east or west-facing panels sometimes outperform south-facing ones simply because they catch direct light when it's available.
Morning shade is the most common culprit. Many homeowners discover that their south-facing panel sits in shadow until 11 AM or later. By then, the sun is already past its most productive angle.
An east-facing panel catches that early light and starts charging while the south side is still dark.
West-facing panels work for the opposite reason. If your property gets shade in the morning but opens up to afternoon sun, a west-facing panel captures the strongest light of the day between 1 PM and 4 PM.
The key test is simple. On the day you plan to install, step outside at 9 AM, 12 PM, and 3 PM. Where is the sun hitting your wall or roof surface?
That's where your panel goes. The direction that receives the most direct sunlight during those windows wins, regardless of what compass direction it is.
Common Mistakes That Drain Solar Security Camera Batteries Every Day
Most solar security camera problems trace back to one of these five mistakes. Each one is avoidable with a few minutes of extra attention during setup.
Mounting the Panel on the Same Wall as the Camera
This is the most frequent error. The camera needs to face the area you're watching. The panel needs to face the sun.
Those are often opposite directions. Mount the panel on a different wall or use a bracket with an adjustable swivel head so the panel and camera face independently.
Ignoring Seasonal Sun-Path Changes
The sun sits high in the summer sky and drops low in the winter sky. A panel angled for July performance can lose 20% to 30% of its charge capacity in December. If you have an adjustable mount, rotate the tilt angle twice a year.
Even a fixed mount benefits from being set at a mid-range latitude angle that covers both seasons adequately.
Letting Vegetation and Debris Build Up
Dust, pollen, bird droppings, and fallen leaves reduce panel output. Our research on solar panel maintenance data shows that dirty panels can lose 10% to 25% of their output depending on the debris load. Clean the panel surface every 4 to 6 weeks during dry, dusty periods.
For snow-prone climates, use the steeper tilt recommended earlier so snow slides off rather than sitting and blocking the cells.
Matching Panel Voltage Wrong to Camera Input
Not all solar security panels and cameras use the same voltage. Some panels output 6V or 12V while cameras expect 5V input. A mismatch can damage the camera's charging circuit or simply prevent charging altogether.
Check both the panel output rating and the camera's required input voltage before wiring them together. Manufacturer specs for both devices list this clearly.
Assuming a Small Panel Is Enough Year-Round
A 5W panel might be plenty in sunny Arizona in July. It won't cut it in cloudy Minnesota in February. Aggregate buyer reviews consistently report that undersized panels cause battery drain problems in low-sun conditions.
Choose a panel rated at least 2 to 3 times your camera's average power draw to leave headroom for overcast days.
Expert Tips for Long-Term Solar Panel Performance and Mount Adjustment
These are the practices that separate reliable solar security setups from ones that constantly need troubleshooting.
Use a Mount With Full Adjustability
Fixed brackets are cheap and simple, but adjustable swivel mounts pay for themselves quickly. A bracket that lets you rotate both the azimuth and the tilt means you can fine-tune the panel seasonally without tools. Most quality adjustable mounts for security cameras range from $20 to $60 and accept standard solar panel bolt patterns.
Verify the Panel's Wiring After Installation
Before you walk away from the install, confirm that the panel is actually charging the camera. Check the camera's battery status in the app. A healthy charge should show measurable gain over 2 to 3 hours of direct sun.
If it isn't moving, the wiring or voltage match is wrong.
Keep a Maintenance Schedule
| Task | Frequency |
|---|---|
| Clean panel surface | Every 4–6 weeks |
| Check mount hardware for looseness | Every 3 months |
| Inspect wiring for wear or corrosion | Every 3 months |
| Adjust tilt angle for season | Twice per year |
| Test camera battery level after charge cycle | Once per month |
Position the Panel for Maximum Morning-to-Afternoon Coverage
If you can only pick one azimuth, go with true south for the Northern Hemisphere. But if the panel also has an east-west swing available, aim it to catch sun from roughly 8 AM through 4 PM. That eight-hour window covers the full productive arc and keeps the battery topped up for overnight camera operation.
Consider a Dual-Panel Setup for High-Draw Systems
Some security setups use cameras with continuous recording or multiple PTZ (pan-tilt-zoom) units. These draw more power than a standard motion-detection camera. For those situations, a dual-panel arrangement with combined 10W to 20W output provides the margin needed to stay charged year-round, even in overcast regions.
Frequently Asked Questions
Should a solar security panel face south or north?
In the Northern Hemisphere, face the panel true south. In the Southern Hemisphere, face it true north. This captures the most direct sunlight across the day.
Your latitude determines the ideal tilt angle, but the azimuth direction stays consistent within each hemisphere.
What tilt angle should a solar security panel have?
Set the tilt angle to your latitude for year-round performance. If your mount is adjustable, increase it by 15 degrees in winter and decrease it by 15 degrees in summer. This optimizes the panel's angle to the sun's changing position throughout the year.
Why is my solar security camera battery always low?
The most common reason is that the panel faces the wrong direction or sits in shade. Other causes include a dirty panel surface, undersized panel wattage, or a voltage mismatch between the panel and the camera. Check the panel direction first before replacing any hardware.
Can I use a solar security camera in a cloudy climate?
Yes, but you need to size the panel appropriately. A camera in a low-sun region benefits from a panel rated 2 to 3 times the camera's average power draw. This gives enough buffer to charge through overcast days and keep the battery topped up overnight.
Does the solar panel have to be mounted near the camera?
No. Solar panels and cameras can be mounted on different walls or surfaces. Use a longer cable run to connect them.
The panel only needs to face the sun. The camera only needs to face the area you want monitored. Separate mounts give you the best of both worlds.
How often should I clean a solar security panel?
Clean the panel surface every 4 to 6 weeks during dry, dusty, or pollen-heavy seasons. In snowy climates, the steeper tilt recommended earlier helps snow slide off naturally. A dirty panel can lose 10% to 25% of its energy output, which translates directly to shorter camera battery life.