Why Is My Lawn Mower Blade Not Spinning?
Why is my lawn mower blade not spinning? You engage the blade lever, the engine runs, but nothing cuts. It's one of the most common small engine complaints out there, and it's usually something you can diagnose yourself.
Deck belts on residential mowers typically last 3 to 5 years before needing replacement, per manufacturer specifications. The safety interlock system is another frequent failure point, especially on riding mowers. Let's walk through how the whole system works and find the real problem.
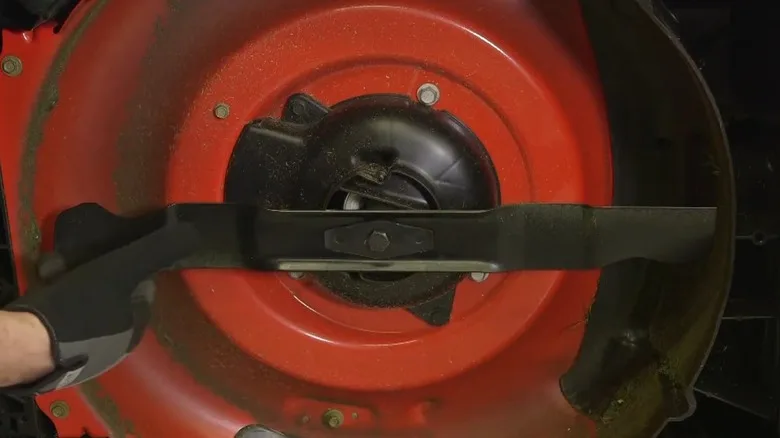
Image source: Bing (Web (fair-use with source credit))
Quick Answer
Your lawn mower blade isn't spinning because one of three things is broken. The safety interlock system may be preventing engagement. The deck belt might be worn, snapped, or slipping.
A faulty PTO clutch could also block the blade on riding mowers. Disconnect the spark plug first, then work through each system in order.
When the Blade Stops Mid-Mow, And What's Really Going On
Before you start pulling parts, you need to know what you're dealing with. The symptom pattern tells you where to look. If the engine dies when you engage the blade, that's usually a safety interlock issue.
If the engine keeps running but the blade sits still, focus on the belt or clutch.
Different symptoms point to different failures. Here's a quick reference to narrow things down fast.
| Symptom | Most Likely Cause | Common Mower Type |
|---|---|---|
| Engine dies when blade engages | Safety interlock switch | Push, self-propelled, riding |
| Engine runs, blade doesn't move | Deck belt broken or slipped | Push, self-propelled |
| Engine runs, blade turns slowly | Belt slipping or warped crankshaft | Riding mower |
| Blade wobbles or vibrates | Loose blade bolt or bent blade | Any |
| Blade works then stops mid-cut | Sheared flywheel key or fouled spark plug | Gas push mower |
| Blade won't engage on electric mower | Blown fuse, bad wiring, or dead clutch | Electric push, self-propelled |
If you're working on a riding mower, the PTO clutch is the single most common failure. As of 2026, replacement PTO clutches for residential lawn tractors run between $80 and $200 from OEM sources. That's a straightforward fix once you confirm the clutch is the culprit.
The key is to stop guessing and start narrowing down. Work from the simplest causes first. If it's not the interlock, move to the belt.
If it's not the belt, check the clutch. That sequence saves time, money, and frustration.
Why Safety Interlocks Are the #1 Cause on Most Mowers
Safety interlocks are built-in systems that prevent the blade from engaging under unsafe conditions. Manufacturers include them to protect operators from accidental blade contact. The problem is that these switches fail, get disconnected, or develop corroded contacts.
When that happens, the blade simply won't spin, even though the engine runs fine.
On riding mowers, you've got three or more interlock circuits working together. The seat switch tells the system the operator is present. The parking brake interlock ensures the brake is engaged before the blade can run.
The PTO switch itself acts as both a control and a safety check.
Here are the most common interlock failure patterns:
- Seat switch: The operator sits down, but the switch doesn't detect weight. The blade won't engage. Try a simple test. Sit in the seat, set the parking brake, run the engine, and engage the blade lever. If it works, your seat switch is faulty.
- Parking brake interlock: If the brake switch is worn or misaligned, the system won't allow blade engagement. Check that the parking brake is fully set and the switch clicks when the lever bottoms out.
- Wiring harness corrosion: Over time, connectors between the switches and the PTO clutch corrode. A loose wire can mimic a dead switch. Look for green or white corrosion on the plug ends and clean them with electrical contact cleaner.
Push mowers have simpler interlock systems, but the same principle applies. A faulty kill switch or a blade brake safety cable can prevent the blade from engaging. Manufacturer service manuals from Briggs & Stratton and Kohler include interlock wiring diagrams for each engine model.
Those diagrams are worth consulting before you replace any parts.
If the engine starts but the blade won't engage, check the interlock system before anything else. Service data from multiple manufacturers confirms interlock failures are among the top causes reported for blade engagement problems on riding mowers.
How the Blade Engagement System Actually Works
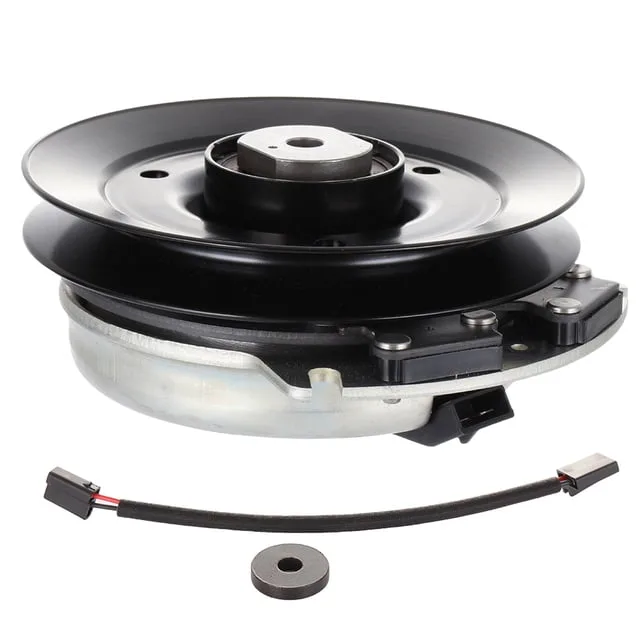
Image source: Bing (Web (fair-use with source credit))
The blade engagement system differs significantly between mower types. Understanding those differences helps you target the right repair faster.
Gas push mowers use a single belt connecting the engine crankshaft to the blade spindle. The belt is always engaged. There's no clutch mechanism.
The blade spins whenever the engine runs. If it doesn't spin, you've got a broken belt, a stripped blade bolt, or a cracked blade adapter.
Self-propelled mowers have two separate drive systems. One belt drives the blade. Another belt drives the rear wheels through the transmission.
You can have a working self-propel but a dead blade, or vice versa. Check which system has failed before you start taking things apart.
Riding mowers and zero-turns use a PTO clutch. PTO stands for Power Take-Off, and it's an electromagnetic clutch mounted on the engine crankshaft. When you engage the blade lever, current flows to the clutch.
The clutch plate compresses, driving the belt that spins the blade. If the clutch fails, the belt never turns.
| Mower Type | Blade Drive Mechanism | Common Failure Point |
|---|---|---|
| Gas push | Direct crankshaft to spindle belt | Belt break, blade bolt |
| Self-propelled | Separate belt for blade and wheel drive | Belt tensioner, transmission |
| Riding / zero-turn | PTO electromagnetic clutch | PTO clutch, wiring harness |
| Electric | Brushless motor direct drive or short belt | Fuse, motor controller, wiring |
Electric mowers built as of 2026 use brushless motors that drive the blade directly or through a short belt. The failure points are different. A blown fuse, a dead battery, or a faulty motor controller will stop the blade without any mechanical wear.
Check the fuse box first on any electric mower.
Step-by-Step: Diagnose Your Blade Problem in Order
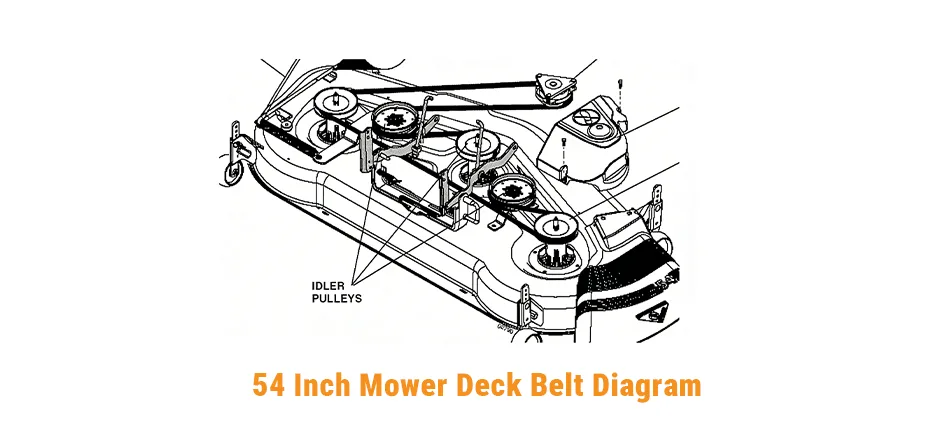
Image source: Bing (Web (fair-use with source credit))
Work through these steps in order. Don't skip ahead. Each step eliminates a specific cause, so staying sequential prevents wasted effort and unnecessary parts purchases.
Step 1: Disconnect the spark plug wire or battery. This is non-negotiable. Disconnect the spark plug wire on gas mowers. Remove the battery or disconnect the negative terminal on electric and riding mowers.
This prevents accidental startup while you're working near the blade.
Step 2: Test the safety interlock system. On riding mowers, sit in the seat, set the parking brake, and engage the blade lever with the engine running. If the blade engages, your interlock is the problem. Start with the seat switch and parking brake switch.
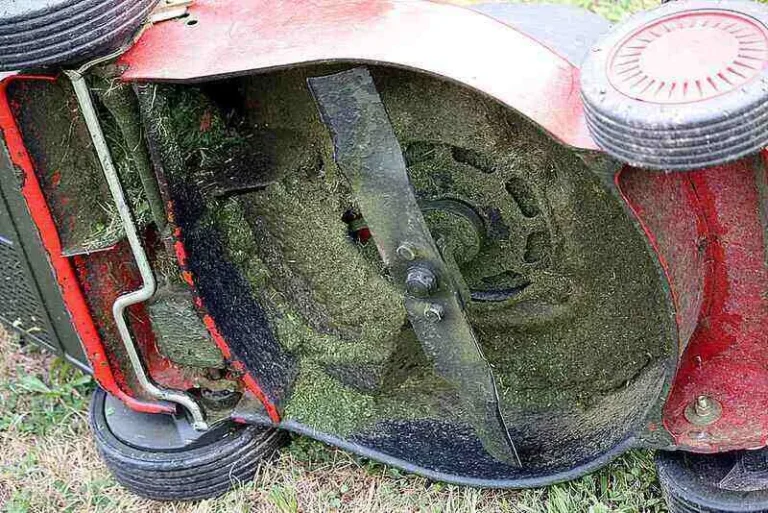
Step 3: Inspect the deck belt. Look under the deck with the engine off. Check for cracks, fraying, glazing, or a snapped belt. A glazed belt looks shiny and smooth.
It's slipping and needs replacement. Per manufacturer specifications, deck belts should be replaced every 3 to 5 years or at the first sign of visible wear.
Step 4: Check the blade bolt and blade adapter. Look for a loose blade bolt. Press down on the blade and try to wiggle it. If it moves, tighten the bolt to manufacturer torque specs.
Most residential mowers call for 40 to 65 ft-lbs.
Step 5: Examine the PTO clutch on riding mowers. Look for cracked wires, burnt connectors, or physical damage to the clutch assembly. A burned clutch often leaves a distinct acrid smell, and the clutch plate may show discoloration.
Step 6: Check the belt tensioner. A worn idler pulley or a weak tensioner spring can let the belt slip even when it's in good condition. Spin the pulley by hand. It should turn freely without grinding.
Step 7: Inspect for debris. Sometimes the answer is simple. Grass clippings, dirt, or a rock jammed between the blade and the deck can prevent the blade from spinning. Clear the deck and try again.
If none of these steps resolve the issue, the problem may be the engine itself. A fouled spark plug or carburetor issue can cause the engine to stall under load when the blade engages.
Safety First: What You Must Do Before Touching a Single Bolt
Lawn mower blades are sharp. They spin at 2,500 to 3,200 RPM on residential push mowers. Working on a live blade system can cause serious injury.
Follow these precautions every single time.
- Disconnect the spark plug wire. Pull the rubber boot off the spark plug and move it at least 6 inches away. Tuck it where it can't accidentally reconnect.
- Disconnect the battery on riding and electric mowers. Remove the negative cable first. Then the positive. Use insulated tools.
- Block the blade before removal. Place a piece of wood or a plastic block between the blade and the deck. This prevents the blade from turning when you're loosening the bolt.
- Wear cut-resistant gloves. Even a stopped blade is sharp enough to cut you while you're working around it.
- Never engage the blade to test while you're near the deck. Start the engine only after you've fully reassembled everything.
The U.S. Consumer Product Safety Commission publishes lawn mower safety guidelines and recall alerts covering common failure modes. Manufacturer service manuals from Briggs & Stratton, Kohler, and Honda include specific safety warnings for each mower model.
If you're working on a riding mower, treat the PTO clutch as a high-risk component. It carries significant electrical current. Wear insulated gloves when handling clutch wiring, and disconnect the battery before removing any clutch connectors.