How Do You Install A Solar Drip Irrigation System?: Steps
How do you install a solar drip irrigation system? Connect a solar pump, filter, tubing, emitters, controller, and water source correctly.
Learning how do you install a solar drip irrigation system can help you water crops with less waste and lower energy costs. A well-planned setup uses sunlight to pump water and delivers it slowly to each plant’s root zone. This guide explains the parts, sizing, wiring, installation steps, common mistakes, and maintenance tips in simple terms.
What Is a Solar Drip Irrigation System?
A solar drip irrigation system uses solar power to move water from a source to plants through narrow tubes and small emitters. Each emitter releases water slowly near the plant roots. This keeps leaves dry and reduces water loss from wind and evaporation.
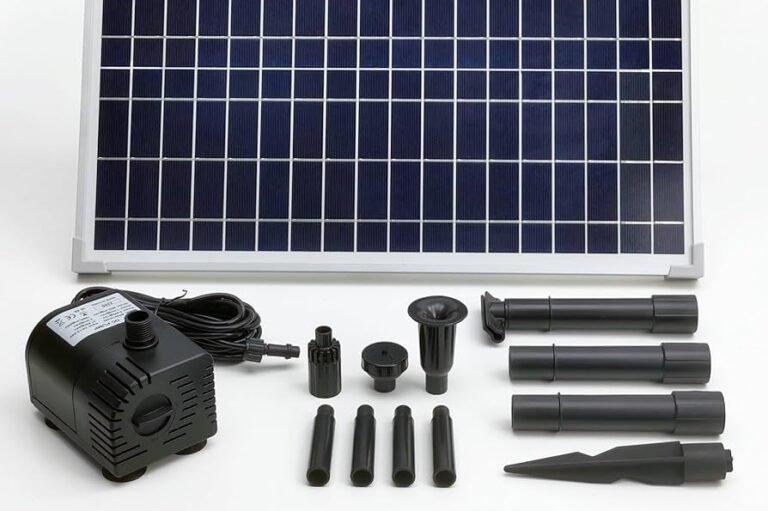
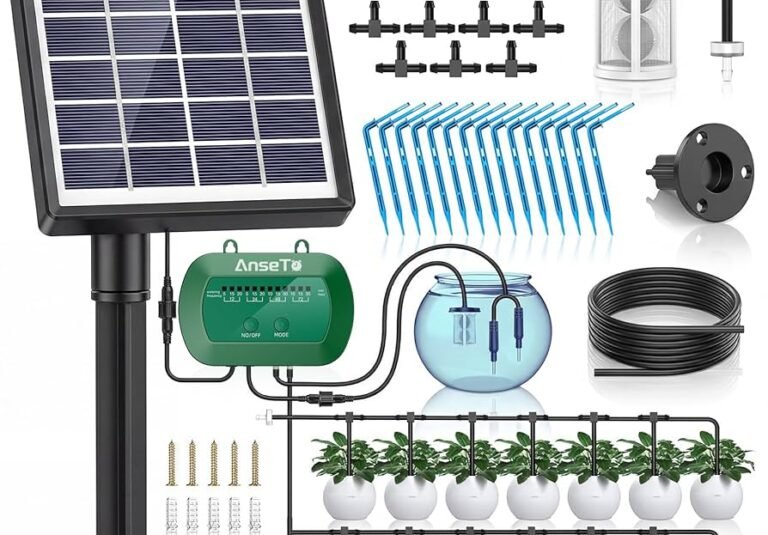
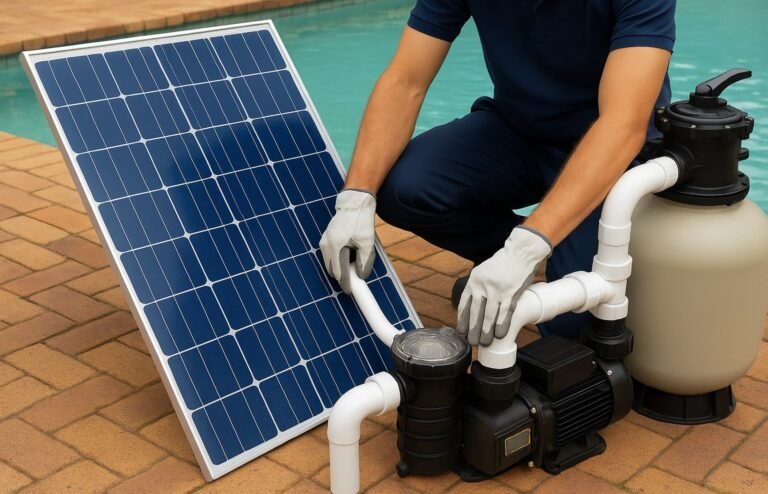
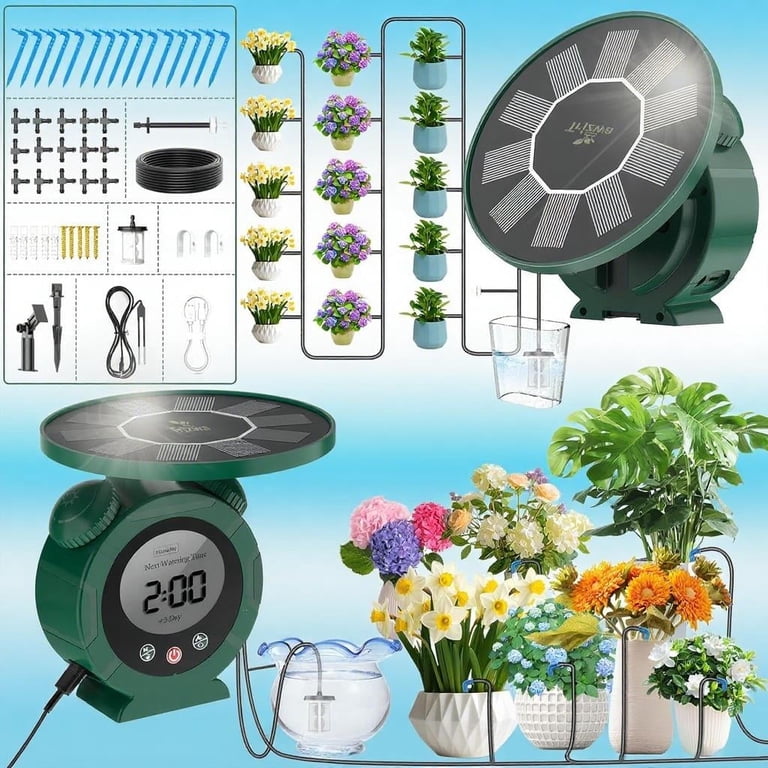
The system usually includes a solar panel, pump, charge controller, battery, filter, pressure regulator, mainline, drip tubing, and emitters. Some small gardens work without a battery if they only run during sunny hours. Larger systems often need battery storage or a water tank for steady flow.
Knowing how do you install a solar drip irrigation system starts with understanding the water path:
- Sunlight reaches the solar panel.
- The panel sends power to the controller.
- The controller runs the pump or charges the battery.
- The pump moves water through the filter.
- The regulator controls pressure.
- Drip tubing delivers water to each plant.

Benefits and Limits of Solar Drip Irrigation
Solar drip irrigation works well in gardens, orchards, greenhouses, remote farms, and small homesteads. It can be useful where grid power is costly, unreliable, or unavailable.
Key benefits include:
• Lower operating costs after installation
• Less water loss than flood irrigation or sprinklers
• Reduced weed growth between plant rows
• Direct watering at the root zone
• Useful operation in remote areas
• Quiet pumping with no fuel fumes
• Easy expansion for new planting beds
The system also has limits. Solar output changes with clouds, season, shade, and panel direction. A weak pump, dirty filter, or poorly sized battery can stop water flow. Drip emitters may also clog if the water source contains sand, algae, or fine silt.
A practical design must match the pump to the well depth, pipe length, elevation, pressure needs, and number of emitters. This is why how do you install a solar drip irrigation system is not only a plumbing question. It is also a water, power, and flow calculation.

Parts You Need Before Installation
Gather all parts before digging trenches or laying tubing. Buying parts as you go often leads to mismatched fittings and delays.
Main Solar Components
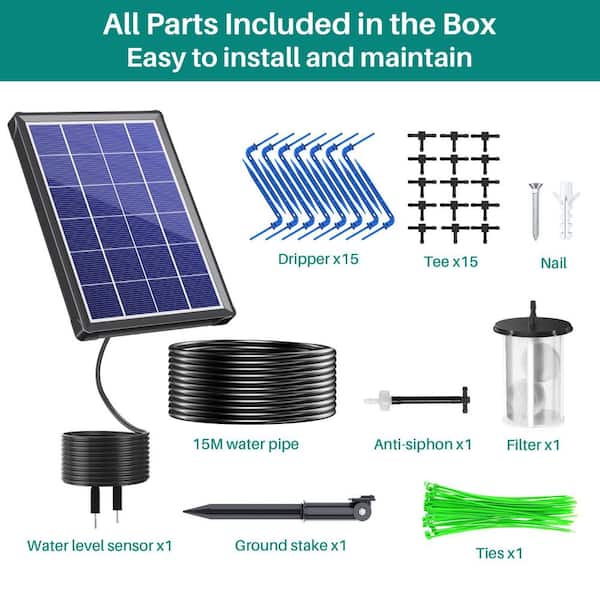
• Solar panel sized for the pump’s voltage and wattage
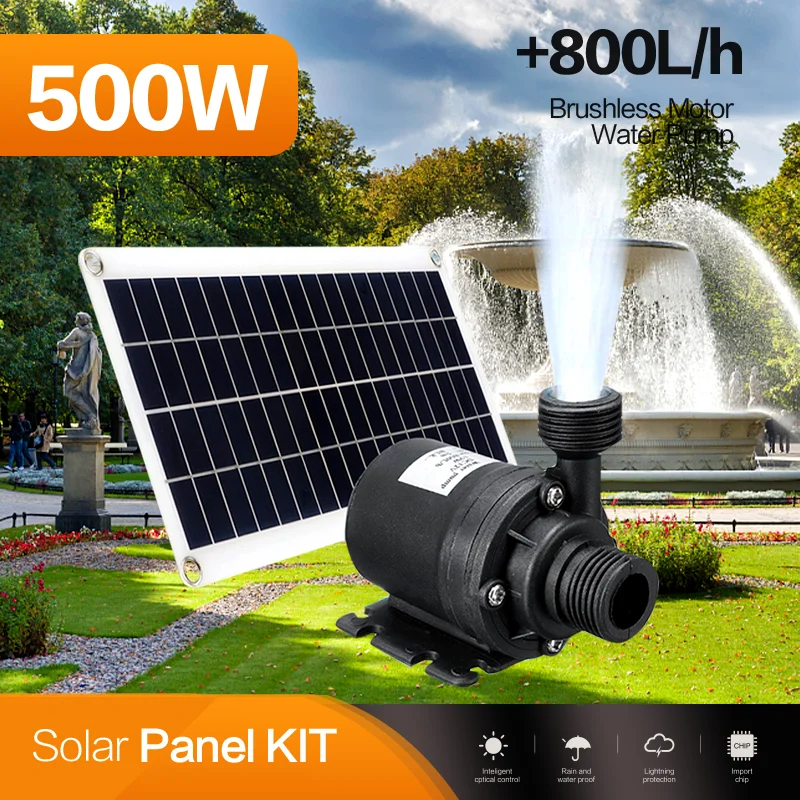
• Solar pump, either surface-mounted or submersible
• Solar charge controller
• Deep-cycle battery, if irrigation must run after sunset or during cloudy periods
• Weatherproof electrical box
• Proper solar cable, connectors, fuses, and grounding parts
Water and Irrigation Components
• Water tank, pond intake, rain barrel, well, or other approved water source
• Intake screen or foot valve
• Main water pipe
• Disc or screen filter
• Pressure regulator
• Backflow prevention device where required
• Drip tubing or drip tape
• Barbed connectors, tees, elbows, end caps, and stakes
• Flush valves or removable end caps
• Automatic timer or irrigation controller
• Pressure gauge
Use a filter that matches the water quality. Many drip systems need filtration around 120 mesh, but the right rating depends on the emitter design and manufacturer instructions. A filter that is too coarse may let particles through, while one that is too fine may reduce flow.
Plan the Layout and Measure Water Demand
Before you install a solar drip irrigation system, draw a simple map of the growing area. Mark the water source, pump location, planting rows, elevation changes, panel location, and the longest pipe run.
Count the plants and estimate their water needs. For example, 100 emitters rated at 1 gallon per hour need 100 gallons per hour when they run at the same time. That equals about 1.67 gallons per minute.
Use this basic formula:
Total flow = number of emitters × emitter flow rate
Then add extra capacity for pressure loss, small leaks, future growth, and hot weather. A pump that barely meets demand may perform poorly when the filter becomes dirty or the battery charge drops.
Also calculate total dynamic head. This includes:
• Vertical lift from the water source to the highest plant
• Friction inside the pipes and fittings
• Pressure needed by the drip emitters
• Losses through the filter and regulator
Pump labels often show flow at different head heights. Do not choose a pump based only on its maximum flow. Maximum flow usually occurs at very low pressure.
A good design may divide the garden into zones. Each zone uses fewer emitters at one time, which lowers pump demand and improves pressure control.

Choose the Best Solar Panel Location
Place the solar panel where it receives strong, direct sunlight for most of the day. In the United States, a south-facing panel often performs well, but the best direction depends on your location and seasonal watering schedule.
Avoid shade from trees, fences, buildings, and water tanks. Even partial shade can reduce the output of some solar panels. Set the panel on a strong frame that can handle wind and rain.
Keep the panel close enough to the pump controller to limit cable loss. Use outdoor-rated cable and seal every connection against moisture. Never leave loose wire joints on wet soil.
For a system that runs only in daylight, the panel must produce enough power during the weakest expected operating period. For a system with a battery, size the battery for the desired runtime and include several cloudy hours or days if your area needs them.
A battery bank should be installed in a ventilated, protected location. Follow the battery maker’s instructions, especially for lithium and lead-acid batteries. Add a fuse near the battery to reduce fire risk from a short circuit.
Install the Water Intake and Pump
Start at the water source. Remove leaves, mud, and debris from the intake area. Install an intake screen to protect the pump, but do not place the intake directly on the bottom of a pond or tank where sediment collects.
For a surface pump, place the pump near the water source on a dry, stable base. Keep the suction pipe short and straight when possible. A long suction line can make priming difficult and may reduce pump performance.
For a submersible pump, suspend it above the bottom of the well, tank, or reservoir. Use a strong support line and protect the power cable from rubbing against sharp edges.
Install a check valve if the pump or system design needs one. This helps keep water in the pipe when the pump stops. Follow the pump manual for priming, wiring, and maximum lift.
The safest answer to how do you install a solar drip irrigation system includes electrical caution. Turn off power before making connections, use the correct fuse, and have a licensed electrician handle household wiring or code-required work.
Connect the Filter, Regulator, and Mainline
The normal order is:
- Water source
- Pump
- Check valve, if required
- Filter
- Pressure regulator
- Pressure gauge
- Mainline
- Zone valves or manifolds
- Drip tubing
This order may change slightly based on the pump manufacturer’s instructions, but filtration should protect the small drip passages. Place the filter where you can reach it easily for cleaning.
The pressure regulator protects drip tape and emitters from excessive pressure. Many drip products work near 10 to 25 psi, but always check the product label. Too much pressure can burst tubing. Too little pressure can create dry areas at the end of a row.
Install a pressure gauge after the filter and before the drip lines. It gives you a quick way to spot problems. A sudden pressure drop may indicate a leak, clogged filter, or pump issue.
Bury the mainline below areas where tools, vehicles, or animals may damage it. Use shallow trenches only where freezing, rodents, and surface traffic are not concerns. In cold regions, drain the lines before winter.
Lay Out the Drip Tubing
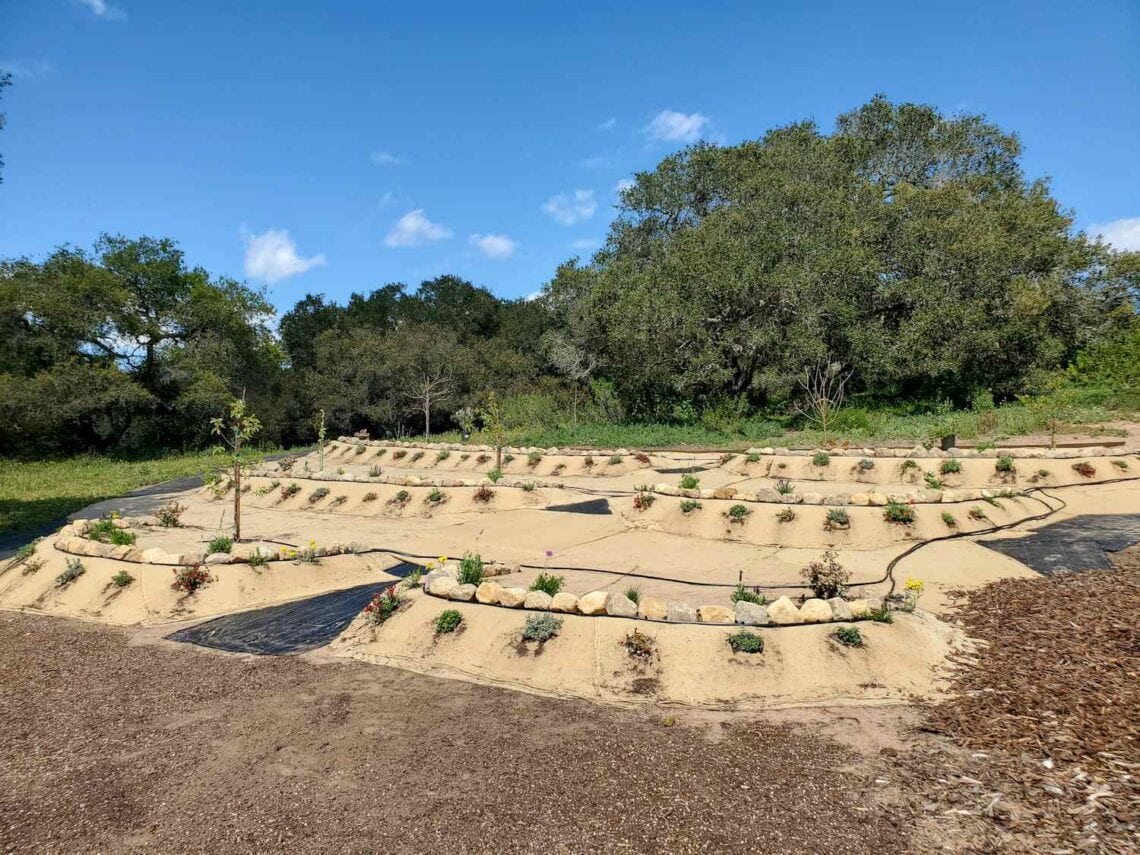
Run drip tubing along each plant row. Place the emitters near the root zone, not several inches away in bare soil. For trees and shrubs, use several emitters around the root area rather than one emitter at the trunk.
Secure tubing with stakes so it stays in place. Keep bends wide and smooth. Sharp bends can restrict flow and create weak points.
Use one zone for plants with similar water needs. Do not place shallow-rooted vegetables and deep-rooted fruit trees on the same timer zone unless their watering needs are close.
At the end of each line, install a flush valve or removable end cap. Flush the lines before installing sensitive emitters or closing the ends. This removes plastic shavings, dirt, and installation debris.
One field lesson applies to how do you install a solar drip irrigation system: do not bury everything before testing. Leave connections visible until the pump, pressure, and flow work correctly.

Install the Solar Controller, Battery, and Timer
Mount the controller in a dry, shaded, weather-protected area. Connect the solar panel, battery, and pump in the order listed by the controller manual. Some controllers require the battery connection first so they can detect system voltage.
Use cable sizes recommended for the distance and current. Thin cable can cause voltage drop, heat, and pump failure. Protect underground cable inside suitable conduit, especially where digging or animals could cause damage.
Set the timer based on plant type, soil, season, and emitter flow. A short cycle may be enough for sandy soil, while clay soil may need slower cycles to prevent runoff.
A simple starting schedule might be:
• Sandy soil: short watering cycles several times per week
• Loam soil: moderate watering two or three times per week
• Clay soil: slow watering with longer pauses between cycles
These are starting points, not fixed rules. Check soil moisture several inches below the surface. If the soil is dry at root depth, increase run time. If water pools or runs away, reduce the rate or split the cycle.
Test the System Before Regular Use
Testing is one of the most important parts of how do you install a solar drip irrigation system. Run the system during strong sunlight and inspect every connection.
Check these points:
• Does the pump start without unusual noise?
• Is water reaching the highest row?
• Does the pressure stay within the tubing rating?
• Are all emitters releasing water?
• Does the final emitter have enough flow?
• Are there leaks near fittings and valves?
• Does the controller stop the pump at the programmed time?
• Does the battery charge correctly, if included?
Flush the mainline and drip tubing until the water runs clear. Then measure emitter output with a small container. Collect water from several emitters for one hour and compare the amounts. Large differences may show clogging, poor pressure, or an oversized zone.
Mark each valve and zone. A small label can save time when you troubleshoot the system months later.
Common Installation Mistakes to Avoid
Many solar irrigation problems come from simple planning errors rather than faulty equipment.
Using an Undersized Pump
A pump may move water well from a tank but fail to provide enough pressure at the end of a long field. Check flow and head together before buying.
Skipping the Filter
Even clean-looking water can contain particles that clog emitters. Always protect drip lines with a filter suited to the water source.
Running Too Many Emitters at Once
Large zones can create weak pressure and uneven watering. Divide the area into smaller zones when the pump cannot meet total demand.
Ignoring Elevation
Water pressure drops as the pipe rises. A garden that climbs a hill may need separate zones, larger mainline pipe, or a stronger pump.
Leaving the Panel in Shade
A panel that receives morning sun but afternoon shade may not produce enough power for the full watering cycle.
Overwatering Because the System Is Automatic
Automation does not replace observation. Check soil moisture, plant growth, weather, and drainage at least once each week.
Maintain a Solar Drip Irrigation System
Routine care keeps the system efficient and helps prevent sudden failures.
Clean the filter at the interval recommended by its manufacturer. During dusty or muddy periods, inspect it more often. Flush the drip lines at the start of the season and whenever pressure changes.
Inspect the solar panel for dust, bird droppings, leaves, and shade. Clean it with water and a soft cloth when needed. Do not use harsh tools that could scratch the panel.
Check wires, connectors, mounting bolts, and pump seals. Look for cracked tubing, animal damage, loose fittings, and wet spots near buried lines.
At the end of the growing season, drain exposed pipes in freezing climates. Remove or protect batteries according to the manufacturer’s storage instructions. A drained system is less likely to suffer burst pipes and winter damage.
A useful habit is to keep a short maintenance log. Record filter cleaning, battery checks, pressure readings, and repairs. This makes small changes easier to spot.
Solar Drip Irrigation Cost and Efficiency
The cost of a solar drip irrigation system depends on pump size, panel wattage, battery storage, pipe length, water source, and automation. A small raised-bed system may be relatively simple. A farm system with a deep well, storage tank, multiple zones, and remote monitoring costs much more.
To improve value:
• Use a storage tank when direct pumping is difficult
• Choose efficient emitters and a correctly sized pump
• Use gravity where the site allows it
• Keep pipe runs short and properly sized
• Water in the morning when possible
• Group plants by water demand
• Repair leaks quickly
Drip irrigation can reduce water loss compared with surface watering, but actual savings depend on design and management. A leaking or poorly regulated drip system can waste water just like any other irrigation method.
Frequently Asked Questions About How Do You Install a Solar Drip Irrigation System?
Can I install a solar drip irrigation system without a battery?
Yes, you can run a small system directly from a solar panel during sunny hours if the pump and panel are compatible. A battery or elevated storage tank is helpful when you need water during cloudy weather or after sunset.
How large should the solar panel be?
The panel should provide more power than the pump needs under normal operating conditions. Use the pump’s voltage and wattage data, then allow extra capacity for heat, dust, clouds, wiring loss, and seasonal changes.
How do I install a solar drip irrigation system for a raised garden bed?
Place the panel and pump near the water source, then run filtered water through a regulator and a small manifold. Lay one drip line along each row, flush the lines, test the emitters, and program short watering cycles.
How often should drip irrigation run?
The schedule depends on plant type, soil, weather, emitter flow, and root depth. Check moisture below the surface and adjust the timer rather than following a fixed schedule all year.
Does a solar drip irrigation system work with a well?
Yes, but the pump must match the well depth, recovery rate, flow demand, and required pressure. A professional should check well and electrical safety details, especially for deep wells.
Why is the end of my drip line dry?
A dry line end can result from low pressure, a clogged filter, too many emitters in one zone, a small mainline, or an elevation change. Flush the line, inspect the filter, and test pressure near the beginning and end of the zone.
Conclusion
Installing a solar drip irrigation system involves more than connecting a panel to a pump. You need a suitable water source, the correct pump and solar power, clean filtration, controlled pressure, well-planned zones, and careful testing.
Start with a small layout. Measure flow, place the panel in full sun, protect the electrical parts, and inspect the system before covering any pipe. With regular filter cleaning and seasonal adjustments, solar drip irrigation can deliver steady water to plant roots while reducing waste and dependence on grid power.
Use these steps to plan your system with confidence, and explore local irrigation guidance or share your installation experience in the comments.